
Guide to Sous Vide Cooking: The Easiest Way to Perfect Low Carb Meals

If you’ve ever wished you could cook your steaks perfectly every single time…just like in a fine dining steakhouse—sous vide might become your new best friend.
Sous vide (pronounced soo-veed) means “under vacuum” in French. It’s a cooking method where food is sealed in a bag and cooked slowly in a temperature-controlled water bath and then finished to perfection with a high-temp sear or other technique.
The result?
- Perfect doneness edge-to-edge
- Super juicy meats
- No guesswork
And for low carb cooking, it’s a dream because it keeps proteins tender without needing sugary sauces or marinades or carb-heavy coatings.
Disclosure: Some links in this post may be affiliate links, which means we may earn a small commission if you make a purchase through them, at no additional cost to you. As an Amazon Associate, we earn from qualifying purchases. We only recommend products we use, love, or believe may be helpful to our readers. Thank you for supporting Low Carb Adventure!
Choosing the right sous vide setup doesn’t have to be complicated. In fact, most home cooks only need one simple tool to get started—but understanding your options helps you make a smarter investment.
Types of Sous Vide Set Ups
1. Immersion Circulators (Most Popular)
These are the go-to choice for most people getting started with sous vide cooking. They clip onto a pot or container where they heat and circulate the water to maintain a precise temperature.

Why they’re so popular:
- Affordable entry point compared to other options
- Compact and easy to store
- Highly accurate temperature control
- Flexible—use with pots or containers you already own
From a performance standpoint, immersion circulators deliver professional-level results without requiring a professional kitchen.
Best for: Beginners, everyday cooking, and anyone who wants great results without overcomplicating things.
2. Water Ovens (All-in-One Units)
Water ovens are standalone appliances that combine the heating element and water container into a single unit.

Pros:
- Streamlined, all-in-one design
- No need for extra containers
- Set-it-and-forget-it simplicity
Cons:
- Higher cost
- Takes up more counter space
- Less flexible for different batch sizes
These are ideal if you prefer a more appliance-driven kitchen setup and want everything contained in one unit.
Best for: Dedicated sous vide users who value convenience and aesthetics.
3. Vacuum Sealers vs. Ziplock Bags
One of the biggest misconceptions about sous vide is that you need a lot of equipment. You don’t.
Vacuum sealer:

- Best for longer cook times
- Ideal for meal prep and freezing
- Creates a tighter seal for consistent results
Zip-top bags (water displacement method):
- Perfect for beginners
- No extra cost
- Works extremely well for most recipes
The key is removing as much air as possible—this ensures proper heat transfer and even cooking.
How to Use a Sous Vide Machine (Step-by-Step)
Sous vide might sound technical, but it’s actually one of the most forgiving and reliable cooking methods once you understand the process.
Step 1: Season Your Food
Sous vide enhances natural flavors, so simple seasoning works best.
- Salt and pepper
- Garlic and herbs
- Light marinades (low carb friendly)
Because the food is sealed, flavors are concentrated—so a little goes a long way.
Step 2: Seal It Properly
Place your food in a bag and remove as much air as possible. Vacuum seal for best results or use a zip-top bag with water displacement (explained later).
Proper sealing ensures:
- Even cooking
- Better texture
- Food safety
Step 3: Set Your Temperature
Temperature is everything in sous vide cooking. Unlike traditional methods, you’re cooking food exactly to your desired doneness.

Common examples:
- Steak (medium-rare): 129°F
- Chicken breast: 145°F
- Salmon: 125°F
This precision is what makes sous vide so powerful—it removes guesswork entirely.
Step 4: Cook (Time + Temperature = Control)
Place the sealed bag into the water bath and let it cook.
Typical ranges:
- Steak: 1–3 hours
- Chicken: 1–2 hours
- Pork: 1–4 hours
Here’s the key difference from traditional cooking—time affects texture, not doneness. This means you have flexibility without the risk of overcooking.
Step 5: Sear for Texture and Flavor

Sous vide cooks food perfectly on the inside—but it doesn’t create a crust.
To finish:
- Pat food dry
- Sear in an extremely hot pan (cast iron works best)
- Sear for 30–60 seconds per side
This step creates the flavor and texture most people expect from grilled or pan-seared food.
Why Sous Vide Is Perfect for Low Carb Cooking
Sous vide aligns naturally with low carb principles, making it one of the most effective cooking methods for this lifestyle.
1. Locks in Flavor Without Extra Carbs
Because food cooks in its own juices, there’s no need for sugary sauces or breading. You get rich, natural flavor with minimal ingredients.
2. Ideal for Meal Prep
Sous vide allows you to cook multiple portions at once and store them for later.
- Batch cook proteins
- Refrigerate or freeze
- Reheat without losing quality
This makes staying consistent with low carb eating much easier.
3. Almost Impossible to Overcook
Traditional cooking methods rely on timing—sous vide relies on temperature.
That means:
- No dry chicken
- No overcooked steak
- No constant monitoring
This reliability is especially helpful for beginners.
4. Consistent Results Every Time
Once you dial in your preferred temperatures, you can replicate results perfectly—every single time.
That level of consistency builds confidence and reduces stress in the kitchen.
Helpful Tips for Perfect Sous Vide Results
These are the small details that take your results from good to exceptional.
Dry Before Searing
Moisture prevents browning. Always pat food completely dry before searing.
Use High Heat for Finishing
A very hot pan creates a quick crust without overcooking the interior.
Avoid Overcrowding the Bag
Water needs to circulate around the food for even cooking. Give each piece space.
Add Fats After Cooking
Butter and oils added before sous vide can dilute flavor during long cooks. Add them after for better taste.
Choose Thicker Cuts of Meat
Sous vide excels with thicker cuts because it cooks evenly from edge to center.
- Ribeye
- Pork chops
- Chicken breasts
These cuts benefit the most from precision cooking.
Best Low Carb Foods to Cook Sous Vide
Sous vide works beautifully with whole, low carb ingredients.
Proteins
- Steak (ribeye, sirloin, filet)
- Chicken breast or thighs
- Pork chops
- Salmon and shrimp
These come out consistently tender and juicy.
Specialty Items
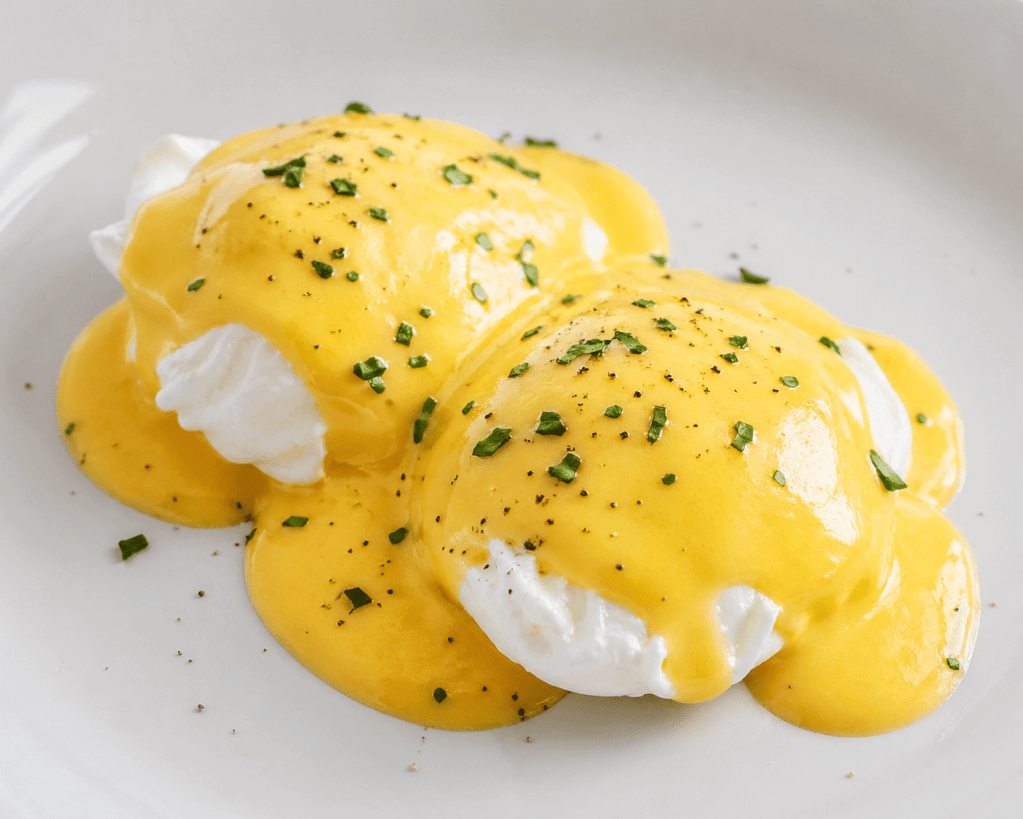
- Eggs (perfect soft or jammy texture and perfect for Eggs Benedict)
- Hollandaise and Bearnaise Sauces
- Ultra creamy ricotta cheese
- Cauliflower with garlic and herbs for mash preparation
- Meal prep proteins for the week
- Custards, mousse jars, and cheesecake bites
- Garlic confit and herb-infused oils
- Shrimp, calamari, and lobster
Sous vide makes even simple foods feel elevated.
FAQs
What is sous vide cooking in simple terms?
Sous vide is a method of cooking food in a sealed bag in a precisely controlled water bath, ensuring consistent and perfectly cooked results.
Do I need a vacuum sealer for sous vide?
No. A zip-top bag using the water displacement method works well and is a great way for beginners to get started. Just add your ingredients to a sealable freezer bag leaving it partially unsealed. Lower the bag slowly into the water and the air will escape out creating a vacuum. Seal the bag once it gets almost fully submerged, but not actually in the water. Now just attach it to the side of the pan and you are ready to go.
Is sous vide cooking healthy?
Yes. It helps retain nutrients and allows you to cook with minimal added fats or carbs, making it ideal for low carb and healthy eating.
How long does sous vide cooking take?
Most foods cook in 1 to 4 hours, depending on the type and thickness. The advantage is flexibility without the risk of overcooking.
Why do you sear meat after sous vide?
Searing adds a flavorful crust and texture that cannot be achieved in the water bath alone, completing the cooking process. This is the process used in the best restaurants and will impress your friends.